How to Use the FREE DICOM Viewer in HUB Healthcare
Your Personal Guide to HUB Healthcare’s DICOM Viewer: Explore and Analyze Medical Images with Precision.

Introduction: The DICOM Viewer in HUB Healthcare is a powerful tool for viewing and analyzing medical images with high precision. It is crucial for doctors, radiologists, and healthcare professionals to accurately assess patient images. This guide provides a step-by-step walkthrough for efficiently using the DICOM Viewer within the context of patient cases.
Digital Guided Walkthrough – Click Here
Step-by-Step Guide:
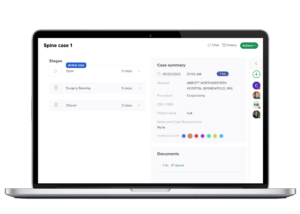
Understanding the Importance of Cases in HUB Healthcare
- Documents in HUB, including medical images, are organized into cases for efficient management. Cases facilitate HIPAA-compliant communication and allow the addition of participants without extra cost.
Step 1: Open Cases Tab
- Guide: Access the ‘Cases’ tab for starting a new case.
- Action: Click on the ‘Plus’ button to initiate a new case.
Step 2: Choose Case Type
- Guide: For simplicity, choose ‘Quick Start.’ Other options include ‘Enhanced’ and ‘Comprehensive Surgery Schedule.’
- Action: Select ‘Quick Start’ and click ‘Select.’
Step 3: Fill Out New Case Form
- Guide: Provide a name for your case and add relevant details. Choose a color for easy identification.
- Action: Complete the required fields and click ‘Next.’
Step 4: Save Your Case
- Guide: Save your case; you can edit or delete it later if necessary.
- Action: Click “Save” to confirm your case details.
Step 5: Expand Your New Case
- Guide: Explore more details about your case by expanding it.
- Action: Click on the name of the case you just created.
Step 6: Add Participants to Case
- Guide: Add other participants, such as patients or healthcare providers, using the plus button.
- Action: Use the plus button to include participants in your case.
Step 7: Upload Your Images
- Guide: Use the document paperclip icon 📎 to upload medical images or documents.
- Action: Click on the icon, choose your files, and press “next.”
Step 8: Set Document Access and Tags
- Guide: Determine who can view your documents and add tags for easy referencing.
- Action: Make your access and tag selections, then upload all the images you want to view in the DICOM viewer.
Step 9: View Images with DICOM Viewer
- Guide: Launch the DICOM viewer to examine your medical images.
- Action: Click on the eye icon 👁️ to open the DICOM viewer and start analyzing your images.
Conclusion:
This concludes our tutorial on using the DICOM viewer in HUB Healthcare. This tool is essential for viewing and analyzing medical images within the framework of a patient’s case. Should you require further assistance, please contact us at info@hub.healthcare.

How HUB Healthcare Can Help
HUB Healthcare offers a comprehensive solution designed to ensure HIPAA-compliant communication in healthcare settings. With features such as secure messaging, encrypted document management, and detailed audit trails, HUB Healthcare provides the necessary tools to protect patient information and comply with HIPAA regulations. By leveraging HUB Healthcare’s robust platform, healthcare organizations can facilitate secure and efficient communication, ultimately improving patient care and operational efficiency. Care coordination